
Important Notice: You must create your WordPress event tickets even if your event is free. The following tutorial is essential so that attendees can register for your events whether they are free or paid.
Creating your WordPress event tickets
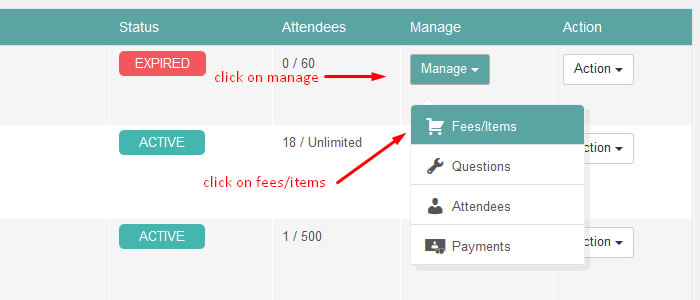
First of all, head directly to the events Management section of your plugin. In this area you will find a list of your events and the options to create your tickets. Find the event you want to create your tickets for, than click on Manage, than click on the Fees/Items link as seen below.
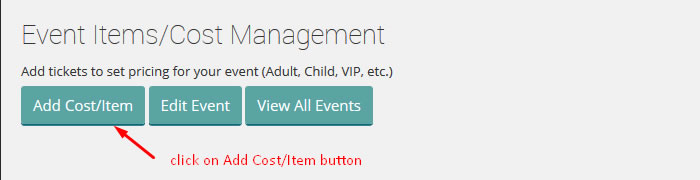
Next, click on the Add Cost/item button as seen in the screenshot below:
Following, you will be taken to the WordPress event tickets creation section of the plugin. Here’s a quick explanation of each of the following fields:
Add Item Section
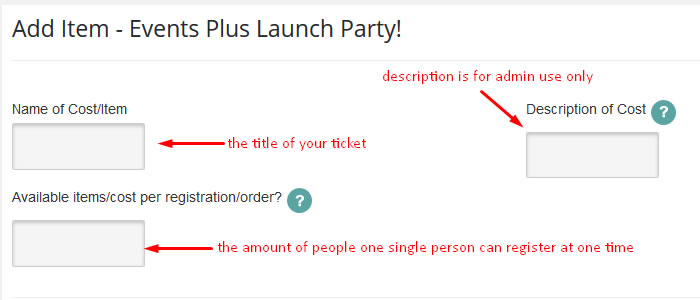
Name of Cost/Item – In this field you will add the title of your ticket as you want it to appear in the single event section of the plugin. This can be Adult, Children, VIP, etc. whatever you want to name it.
Description of Cost – This field allows you to add a description of your event ticket. This information will be visible only to the admin in the events tickets list section. It is used for reference only.
Available items/cost per registration/order – Important: This field allows you to decide how many people one single person can register at once. Its basically group registering, you can decide if you want to allow groups of 2, 5, 10, etc. to be registered at once by one single person.
Value/Cost Section
Next, you will add the cost of your ticket. Here’s a quick explanation of this section:
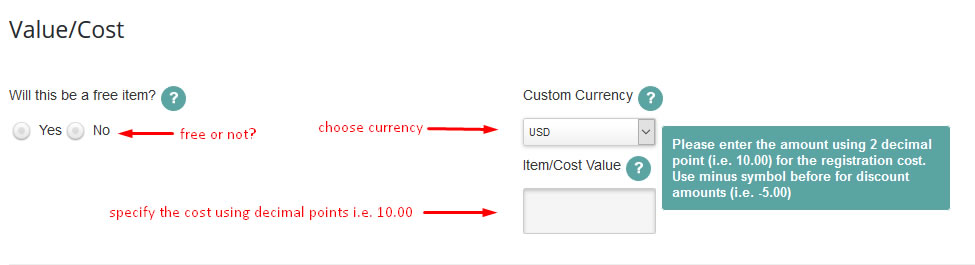
Is this a free item? – Pretty self-explanatory, choose here if your event is free or not.
Custom Currency – If its a paid event, choose the currency for this particular ticket. If the event is free than the currency option wont matter.
Item Cost/Value – This is the actual cost of your event. Make sure you display the cost using decimal points like this: 10.00, 5.00, 25.00 do not add a currency symbol.
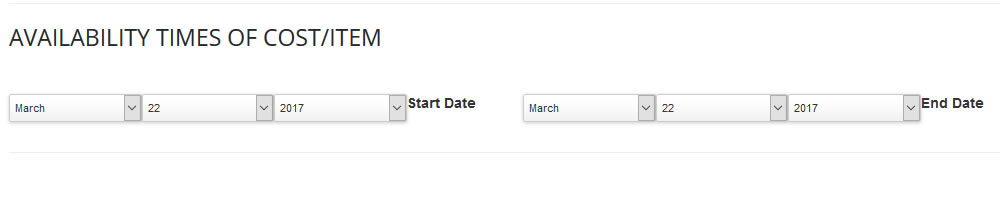
Availability Times of Cost/Item Section
Important Notice: The availability time of your tickets is really important for your events. If these dates are not correct, attendees will not be able to register for your event.
Start and End date – Choose the time frame when your tickets can be purchased. For example, they can be purchased one week before your event starts. Or, you can also choose the end date to be 24 hours before your actual event so nobody can buy one day before the actual event.
Finally, you are in charge of creating your event tickets and choosing when those tickets can be bought. If you need further assistance you are welcome to checkout our knowledge base section for more tutorials. Cheers 🙂